
 |
| Sew Seasonal Blog Hop |
Welcome Sew Seasonal blog hoppers to my little home on the blogosphere! Thanks for dropping in, feel free to hang out a while.
One of my must-do Christmas traditions is new ornaments for my children each year. They have their own little boxes of ornaments and I just love watching those boxes fill up over the years.
So when I saw Alyce's very cute Ornamental pattern, I decided to turn my block into personalised ornaments for my children.

Working with block two, here's a mini-tutorial to turn any of these blocks into ornaments. Note that this would make a great chain piecing project if you wanted to cut your 1 1/2 inch strips from the width of fabric and whip up a whole bunch of these cuties.
Materials - for 5 inch pattern:
As per pattern:
2 - 4.5in x 1.5in strips of red fabric (I used two different prints)
2 - 4.5in x 1.5in strips of green fabric (I used two different prints
(Note: you will not be using the white background fabrics)
Also:
6in square backing fabric
6in square scrap of thin binding or pellon
6 inches of narrow red or green ribbon
red or green sewing threads
red or green embroidery floss (if hand sewing)
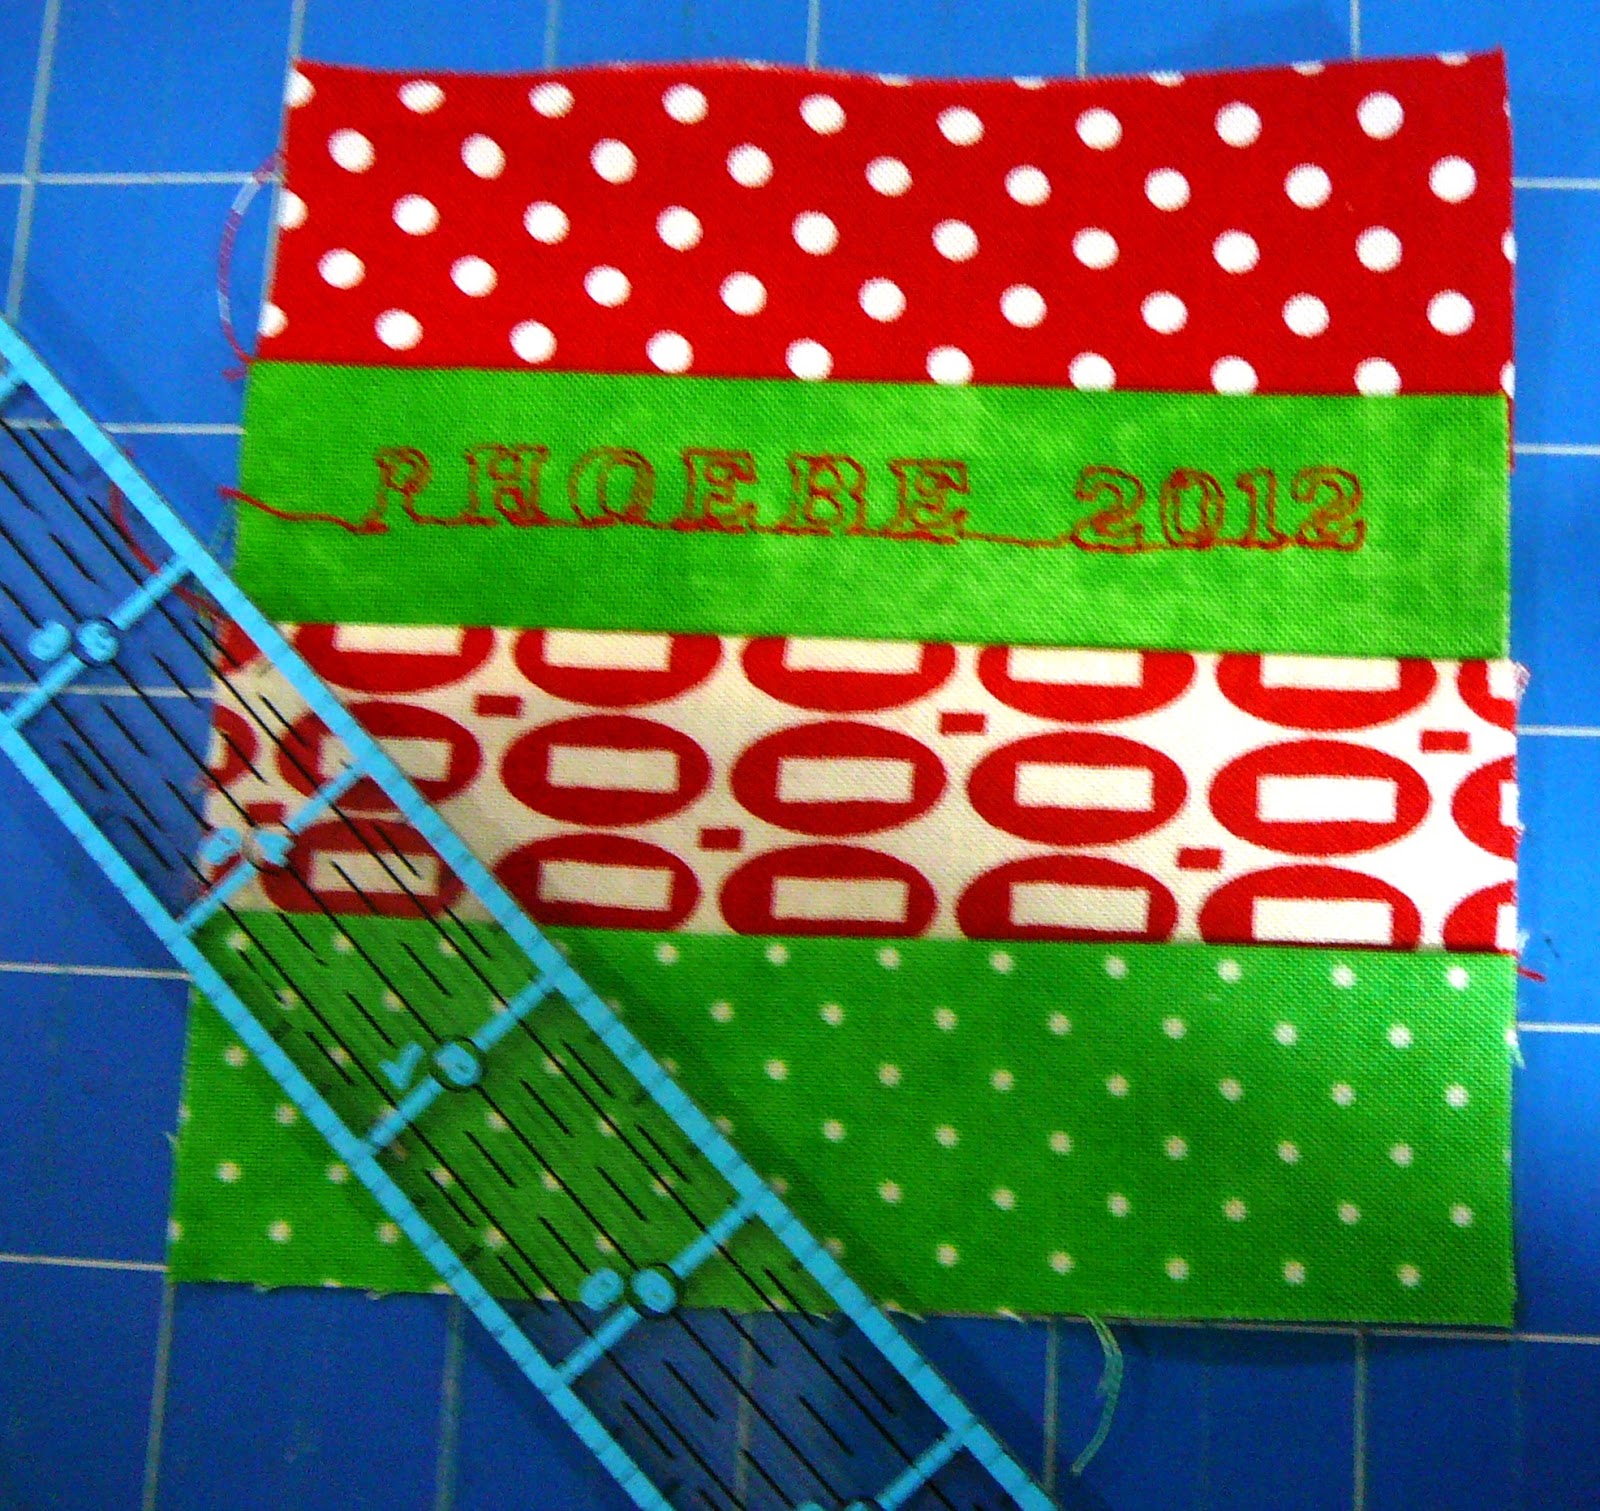
Start by embroidering your name and the year onto one of the colored strips in a contrasting thread. I used a marbled almost solid for this strip so it showed up well. Regular readers will know I just discovered the alphabet function on my machine, so I machine embroidered it. You can get the name on any way you want - hand embroidery, fabric marker, whatever floats your boat.
Chain piece the red and green pieces into pairs, then pair them up so you have a square of red-green-red-green.

Trim the corners by lining up your ruler at a 45 degree angle and cutting them off (at the bottom of the ruler). Note that I cut my first one slightly further in than this diagram and I prefer the more angled result, it was also easier to get the sharper points. Again, do what works for you.
Cut your batting and backing just a bit bigger than your ornament fronts. (About 6 inches).

Layer your batting, then backing right side up, then ornament front right side down. Stitch through all three layers with a 1/4 inch seam, leaving the top open for turning and ribbon insertion.


Insert the ribbon, pin to hold it in place, and top stitch about 1/8 inch around the entire block. Quilt across the strips, I used decorative stitches for this.
Wait until you're allowed to put up the tree and hang your ornaments!
Thanks for checking in. Paper piecing fans, don't forget to visit my blog hopping buddy Marieka of Bespoke Bites today, where she has a delightful little card using a paper pieced blog.
And have yourself a merry little Christmas (to paraphrase my most favoritest Christmas song ever!).
These look great Jane! Love the personalized idea - makes them really special!
ReplyDeleteI wish my machine did text stitching!!! Very jealous! And nice use of non christmas prints :)
ReplyDeleteWhat a great idea! These turned out really well!
ReplyDeleteI love your ornaments, they are beautiful !!
ReplyDeleteGorgeous!! I too am jealous of your text stitch!
ReplyDeleteSuch a cute idea!! Love them!
ReplyDeleteWhat a lovely idea, must remember this if I get a chance!
ReplyDeleteThis is so cute! I have just figured out the same thing on my machine! I'll have to try these. Thanks!
ReplyDeleteHow fun, hopping along with SS, cute idea and tradition. thanks for sharing.
ReplyDeleteOh WOW - these are so cute Jane! Totally love the idea of a new ornament for each child each year. I buy just one each year for the tree - but it is mainly to replace ones that have broken!
ReplyDeleteThey are adorable! What a great idea :)
ReplyDeleteWhat a great idea! Those are adorable!
ReplyDeleteI definitely think I need to make these for my grandkids this year!
ReplyDeleteJane I love the idea that each of your kids gets a new tree ornament each year. I'd have a few years to catch up on though. These are a neat idea for the Ornamental blocks.
ReplyDeleteBeautiful!
ReplyDeleteFantastic idea. Love "make your own" ornaments.
ReplyDeleteSuch a perfect idea!
ReplyDeleteThese are just adorable. I've been wanting to make some ornaments.....great tutorial.
ReplyDeleteThis will be on my list to make for the holidays. Thanks for sharing.....Judith, Texas
ReplyDeleteThanks for the tutorial. I'll definitely be making some of these for Christmas. So cute.
ReplyDeleteThese blocks are so adorable. I love the idea of turning these blocks into actual ornaments! I like how you personalized it too!
ReplyDeleteGreat gift idea too.
ReplyDeleteI love your ornaments, they would be great as gift tags. Your colors are perfect.
ReplyDelete