Wednesday, April 30, 2014

Progress on the Harry Potter Quilt

My goal for April was a pretty simple one, to make some progress on my Harry Potter Project of Doom - aka the Bookshelf Quilt - which I started late in 2012.


I had nine blocks complete and I'm pleased to report I've done another nine this month. I still have twelve to go but none of these paper piecing blocks are too fiddly and some are really very simple. It's been a fun opportunity to play with different fabrics to my usual style, finding the perfect matches for the Harry Potter theme.


  I am refusing to pack up my sewing machine or these fabrics until I finish all 30 blocks in this quilt. Then I have to embroider book names onto the book, which I do by machine. I found a list of all the books mentioned in the Harry Potter book series, so it's fun to choose the ones I want to put on the shelf.


My only drama is that somehow my blocks are coming up different sizes. Initially I may not have selected actual size when I printed the PDF and my early blocks are 1/2 inch smaller than expected. So then I printed the newer blocks the same way but I am using the pattern that is now on Craftsy and these ones are coming up 1/2 inch smaller again. It's a little frustrating but not the end of the world - fortunately these are the kind of blocks where I can trim a bit or add a bit more background fabric as required to make it all work. 


I was also pleased to find a great fabric for the border and backing, a yellowy-gold print with stars on it, for a measly $4.99 a metre at Spotlight - then I got it at 40% off, making it a very cheap quilt back. 


I'm looking forward to getting this quilt on to the finished list!

Linking up with the ALYOF April Finishes Party over at Sew Bittersweet Designs

Friday, April 25, 2014

Paper Piecing Party On the Road: Setting Up Your Paper Piecing Workspace

First things first, a massive thank you to the beautiful Kristy for letting me hijack her Paper Piecing Party for the week! And if you're visiting from Quiet Play, thanks for stopping by! Feel free to take a look around.

Kristy is one of my quilting besties, we're in the Wombat Stew paper piecing bee together, and we are real life quilting group friends too (yes, I know I'm lucky!). She's been to my house and knows how fussy I can be about my creative space, so when I asked if she was interested in sharing my paper piecing set up with her readers, she probably figured I'd have a very particular way of doing things... and I do!

I rarely paper piece away from home because I really am fastidious about how my paper piecing workspace is set up. I'm going to share my set up and process with you - maybe you'll get something out of it, and if you've never been super comfortable with paper piecing, this might help you set up your own space.

I consider paper piecing quite different to traditional piecing in terms of set up. When I'm traditional piecing I'll do a heap of cutting first, then sew, then press in a batch later on. Having everything close at hand isn't as critical.

But when I'm paper piecing I find myself cutting fabric, stitching, trimming and pressing with every seam.  (And yes, I know it's not mandatory to press with every single seam, but I like to. Fussy, is what your call it.) Cast your mind back to high school home ec, did you learn about the kitchen work triangle of stove-sink-fridge? Well, your paper piecing work triangle is pressing station, cutting station and sewing machine. I'm a creature of comfort, once I sit at my machine I don't want to move, so I have everything at hand.

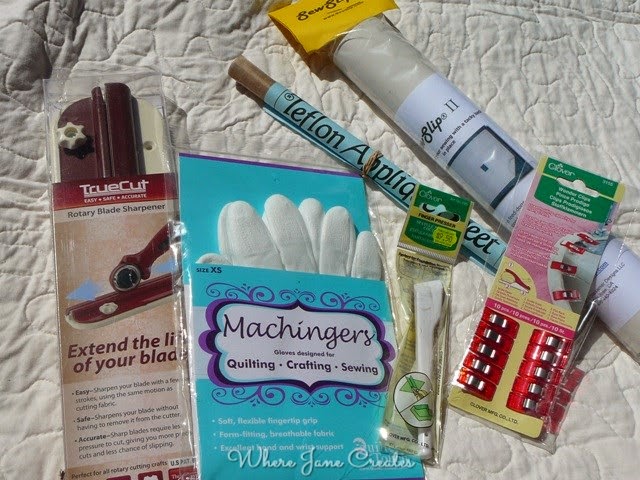
Before I start, I gather my sewing materials. A small bin for teeny scraps, small rulers, a larger ruler for cutting down large pieces, a medium sized pair of sewing scissors, an unpicker (keeping it real!) and my regular and small rotary cutters. My baby rotary cutter is the one I bought when I first started quilting, sometimes it's easier to use than the regular 45mm one when you're making small cuts.


And from the regular stationery section, a pair of paper scissors to cut my paper pattern pieces, a pencil to write what colour fabric goes on each pattern section (I ALWAYS do this) and a white glue stick to stick that first piece in place.


My pressing station is to the left of my machine (I am left handed, so you might prefer to have yours to the right). I covered small TV table with batting and calico and it makes the perfect pressing station. Credit for this idea goes to Elizabeth at Oh, Fransson!.


You can see how it sits right by my cutting table and I just have to spin my chair to press.


My cutting mat is to the left of my sewing machine so I can simply cut my fabrics and trim them up without moving.

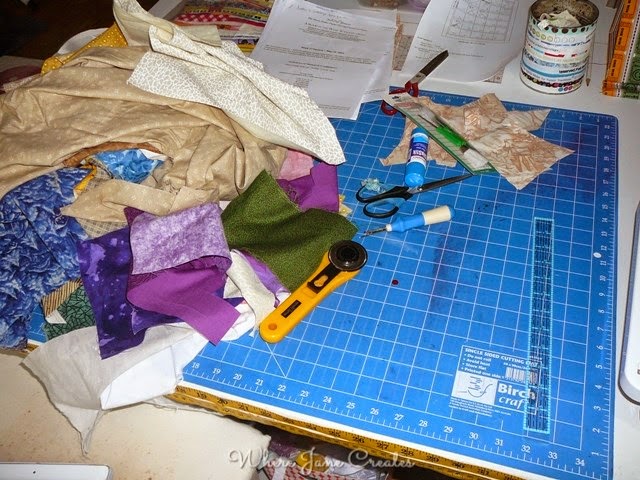
Keeping it real moment... just in case you thought super fussy equates with neat, it doesn't!! Right now I'm piecing my Harry Potter quilt and it requires a huge variety of fabrics. All of which are right here on the cutting mat!!


My OTT Lite sits right behind me shining light on the machine. It's perfect for making sure your seam allowance is okay before you stitch. It is also near impossible to take a photo of this, but you get the idea!


I like to have my extension table on my machine for paper piecing. I figure that a larger flat surface to place your pieces on is better.


 And this is my Wombat Stew block for Ms Midge, who is our April queen. Midge has decided on a London theme for her blocks and Kristy has designed us a gorgeous collection.


Thanks for taking a little tour of my paper piecing space - now it's your turn to link up and share all your beautiful paper piecing goodness with me!

Quick refresher on what the deal is with the Paper Piecing Party (full details here):
* It’s on every weekend here at Quiet Play, starting Friday.
* Link up something you’re working on that’s foundation paper pieced
* Link a blog post or flickr photo
* Visit at least two other links and leave a comment because that’s half the fun!


Tuesday, April 22, 2014

A Sweet and Simple iPad Stand

I am plugging away on the whole WIP thing, but now and again the Quilters ADHD kicks in and I want to make something NEW. I've decided when that urge hits, I'll make something quick and simple for around the house. The only condition is I have to finish it straight away!

We recently subscribed to Foxtel (cable TV) and one of the perks is that I can watch on my iPad, no matter where I am. I love to watch music videos while I'm sewing, the only problem was that my iPad cover flipped over into a stand that was way too low. So naturally, the only solution was to make a new one.


I used some of my stashed American Jane prints to make this super simple iPad stand. Then I decided I liked it so much that I made a smaller one for my phone (it's a bit big for the phone, but never mind!). Note the blue, because I have to share the iPhone one with my daughter!


After a quick search on Pinterest, I found this fantastic free pattern on Craftsy by Gaila Designs. This pattern was super easy to follow and came together very quickly. I also love that it folds flat so I can easily throw it in a bag and take it with me.


To make the smaller stand I cut the base board to 4in x 4in and cut each piece of fabric at 5 1/2 x 18/12in. (This will make sense once you read the pattern).

Too easy!

Linking up with Sew Cute Tuesday over at Blossom Heart Quilts. And Needle and Thread Thursday at My Quilt Infatuation.


Sunday, April 20, 2014

Sunday Stash: Happy Birthday to Me!

My birthday was a few weeks ago, and this year I decided the fabric fast was off for my birthday and treated myself to some quilting related goodness.

First up, a gift from my hubby and the kids. The easiest way to do this and ensure I'll get something I need is to go to an online store, make a wishlist, then give my login details to my husband. Despite some very good acting on his part along the lines of "I don't think I got that email... do you think if I order it tomorrow it'll arrive by your birthday?" (haha, so funny!), this worked.

They bought me some tools - not super exciting, but useful.


I also caved and bought a couple of packets of Washi tape from Spotlight a while ago and then gave it to my daughter to put away until my birthday.


Then, Spotlight was kind enough to hold a special just for my birthday - $1 fat flats! Woohoo! They only have this sale once a year and I seem to recall it's often near my birthday. For that price, I let myself splurge on 30 something fat quarters. I also got a couple of 1 metre cuts of clearance fabric for $4 a metre.


And Spotlight also had the last of their Christmas craft stock heavily discounted, I got ribbon packages and scrapbooking pads for $2 each. I gave some of the ribbons to the preschool where I work for Christmas projects, and I split the paper packs with a scrapbooking friend. And a packet of Kraft paper, which is my go to for scrapbook layouts and so hard to find, plus a few other bits of pieces also mysteriously appeared in my trolley.


I also heard that Kmart had fantastic metal storage containers really cheap, so I bought a pen holder and desk organiser, as well as an enamel storage tin with "Craft" written on the side that I'm using to store my English Paper Piecing.


Then a naughty, enabling friend who is also meant to be on a fabric diet told me that one of the local thrift stores had a heap of quilting fabric for sale, so I had to have a look. I got some nice designer cuts of fabric, and paid about $25 for around five metres of fabric.


We are doing a birthday swap with my Wombat Stew bee girls, and I got the very generous Kristy as my birthday fairy. Since she knew I was on a fabric diet, she bought me a gift voucher for an Australian online store. I hit the sales section and got about 16 quarter metre cuts (I love places that will do quarter cuts, since I like to have lots of little bits of fabric). Since the store had free shipping for over $50 I let my cart go over $50 to take advantage of that.... but I was very restrained, at one point I had over $90 worth of fabric in my cart.

I got a lovely little collection of stash builders and low volumes.


And... eventually my birthday had to end and now the fabric fast is back on. Probably a good thing, because I don't think I could keep up this pace forever!

Linking up with Sunday Stash with Molli Sparkles.


Friday, April 18, 2014

Friday Finish: The Low Volume Rainbow

I actually finished this baby up a few weeks ago, but life has been crazy and Friday has slipped past numerous times without me posting.


This finish was my February goal for ALYOF and while I didn't get it done in February, it was finished in early March.

This was my first real go at improv piecing, and I love it... it was a fantastic way to use up loads of scraps and hard to use fabrics.


The quilting took forever. It was straight line quilting, but I used seven colours of thread, one for each colour of the rainbow. I took each colour over the corresponding band in the piecing, then into the low volume either side, and horizontally along each band. I love the effect, and how each low volume section is quilted in the colours either side of it. But the thread burying.... OMG. That took forever and ever and ever!!!!


I ended up totally overestimating how much of the low volume improv piecing I'd need for the strips on the front and had plenty left over, so I paired it with some grey solid for a pretty pieced back. Which meant no fabric purchases for the back too.


The only issue I have with this quilt is that it's not totally square, I have no idea why since I squared it up with a ruler when I finished quilting, but I guess the improv nature means it's hard to gauge that it's perfectly square. I'm trying to decide if I unpick some binding, trim and rebind, or if I just accept the fact that it's imperfect, like those people whose shoe sizes are a whole size different.


I'm linking this up with TGIFF over at Blossom Heart Quilts and Finish it Up Friday at Crazy Mom Quilts.

Have a fantastic Easter, and I hope the bunny is kind to you.


Wednesday, April 16, 2014

WIP Wednesday: the Domestic Bliss quilt

You know those quilts you've been working on forever, plodding away, making slow progress? This was one of those quilts. I started it in May last year for our bed. I have been working on it while I was at quilt group, which amounts to a few hours a month. 

Slow going. 

At quilt group last Sunday I finally started to see it coming together, I had half the stars pieced and it was all starting to make sense.Since I am on school holidays for two weeks, when I got home I decided not to pack it away. I was determined to get it done.


Three days of solid piecing later, I'm still going. There was so.much.pinning. So.much.pressing. So.much.chain piecing. But we have rows, I'm happy with that. I can see the finish line.


I am loving the secondary pattern of the yellow and white snowballs. A nice place to rest the eye as this baby is busy!!


I started with some of Liz Scott's Domestic Bliss fabrics for Moda. I absolutely love the saturated hues of this line. I wish I'd been able to get some more of the yellows, didn't know those ones existed!

Because I don't like to use just one line in my quilts, I pulled additional fabrics that played nicely with the colours in the Domestic Bliss.

The pattern was a freebie from Moda Bakeshop called Nough Said by Cindy Sharp. I sized it up to a queen size quilt, just to make it a little more challenging. And worked from a black and white print out with pencil scrawl on it, because I love self-torture!


I do have one little problem though. I bought a Denyse Schmidt print at Spotlight which seemed like it would be the perfect border, but now I'm really not so sure. I like the solid yellow sashing, and the striped binding, but the border print seems too busy and too orange. I have enough of it for the backing and I'm fine with using it for that... just not sure as a border. I may need to go shopping to see if I can find something a little more subdued.


Linking up with Sew Cute Tuesday and WIP Wednesday.